Maintenance Hints and Tips - Overrunning alternator pulley | HELLA
Maintenance Hints and Tips
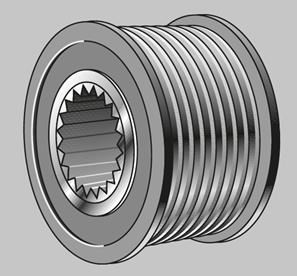
Overrunning alternator pulley
Testing and diagnostics
The overrunning alternator pulley, also known as the alternator freewheel clutch, must be checked regularly to ensure that the unit drive is functioning correctly and to prevent damage.
An alternator freewheel clutch can be tested as follows:
1.
Dynamic testing when the engine is running
- Open the hood
- Start the engine and let it idle
- Put on protective goggles and observe the belt drive
- Operate the engine in different speed ranges and carry out a visual inspection
- Switch off the engine and observe the overrunning alternator pulley
A defective freewheel can be identified by the unit drive not running truly and the ensuing noise. An alternator with an intact freewheel should slow down and come to a standstill when the engine is switched off.
2.
Static testing with the engine switched off
- Switch off the engine
- Remove the ignition key
- Remove the V-belt
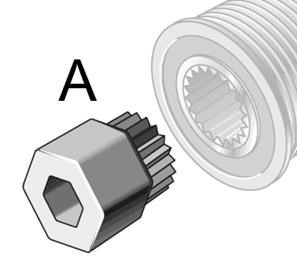
- Remove the cover cap on the freewheel
- Apply the assembly tool (A)
- Grasp and hold the outer ring of the pulley with one hand
- With the other hand, turn the assembly tool in both directions
If the freewheel is working correctly, the shaft will rotate freely in one direction and is locked in the other direction. Depending on the manufacturer, there may be increasing resistance in the locked direction.
The alternator freewheel clutch must be replaced if the above results are not achieved.
Repair note
The overrunning alternator pulley must always be tested whenever any repair work is performed on the unit drive.
We recommend the following procedure:
- If a new alternator is installed, always replace the alternator freewheel clutch at the same time
- Replace V-ribbed belts, clamping devices and alternator freewheel clutches at the same time
- Replace the alternator freewheel clutch after 120,000 km at the latest
Please observe the relevant vehicle manufacturer's repair and maintenance instructions in this regard.