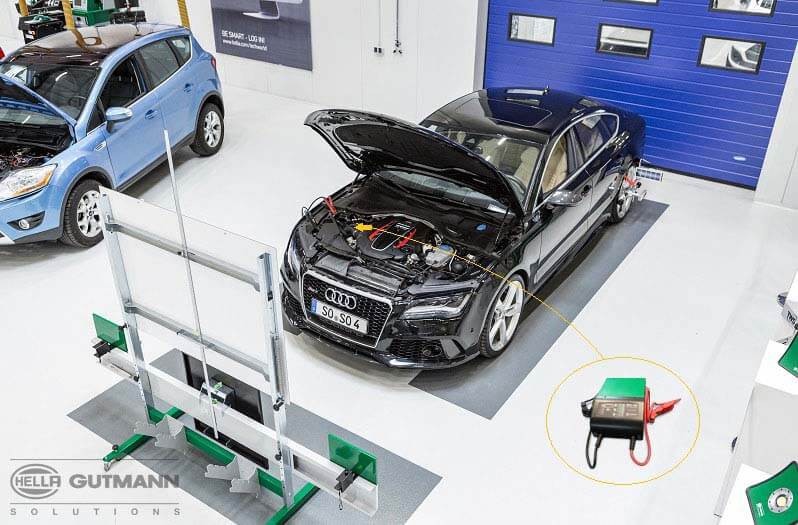
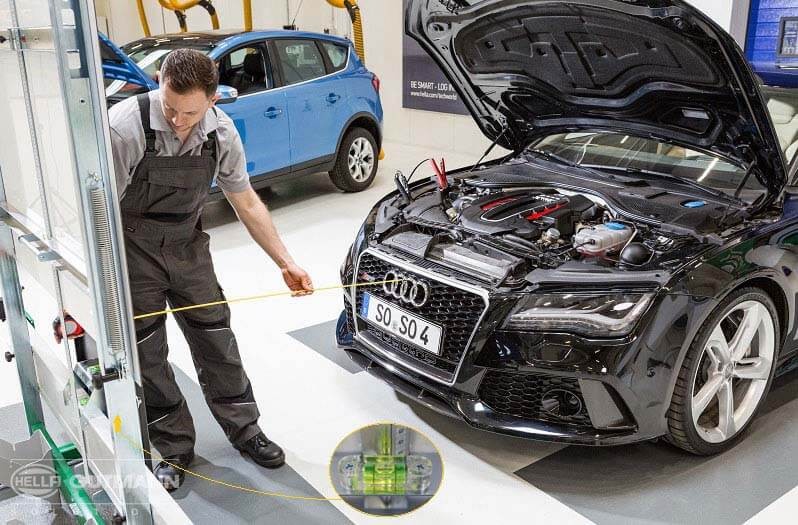
Adaptive Cruise Control - adjusting ACC sensor

The increasing use of modern driver assistance systems continually changes the challenges faced by independent workshops. Radar-based assistance systems serve as one example: while their adjustment was the concern of the respective brand workshop until recently, independent workshops with the right equipment can now also easily carry out such work.

Important safety note

The following technical information and practical tips have been compiled by HELLA in order to provide professional support to vehicle workshops in their day-to-day work. The information provided on this website is intended for suitably qualified personnel only.

Table of Content
1. Good to know

Adaptive cruise control: CSC tool & automotive diagnostic unit

Added value for workshops: the modular CSC Tool and the mega macs diagnostic units

The expanded modular CSC Tool system (CSC = Camera and Sensor Calibration) from Hella Gutmann Solutions allows workshops to professionally calibrate cameras on vehicles from numerous car brands in conjunction with current mega macs diagnostic units. Furthermore, due to additional expansions, all current common radar systems can also be aligned.

Popular driver assistance systems

The CSC Tool is also beneficial for workshops due to the increasing importance of driver assistance systems – as these have been particularly popular among drivers for years. And the trend is increasing. Whether intelligent cruise control via radar, lane assistant or automatic parking assist – to name just a few – the driver assistance systems not only provide greater comfort, but also a higher level of safety. Provided they are aligned regularly.

The perfect aid for this is the CSC Tool in conjunction with a mega macs diagnostic unit. Here, the diagnostic unit takes over the communication with the control unit and initiates the calibration. To execute the calibration itself, however, a suitable calibration panel is required and it must be aligned correctly. It is here that the CSC Tool comes into play.

We provide an overview of the main CSC TOOL features:

Modular principle

Due to the modular expandability, users are able to calibrate vehicles of many common brands and to also use future functionalities. The basic CSC Tool already includes the height-adjustable base with adjustment bar and two mirror units, two laser measuring heads and two calibration panels, which already cover several important brands. Through new modules, in the future, other brands and additional functionalities can also be used.

Easy, fast use

The handling is extremely easy for workshop employees, as the diagnostic unit guides you through the successive individual work steps, right the way through to the initial click that starts the actual calibration process in the control unit. Matching the image from the vehicle camera to the target image saved in the system only takes a few seconds, and the entire process is completed in just 20-30 minutes.

Also for radar calibration

The system can also adjust all common radar systems thanks to specially developed radar kits. As with all sensors whose measurements take place at distances of several hundred metres, long-distance radar heads must also be precisely set to the driving axle (rear axle) of the vehicle. However, by contrast to the rigid attachment of a camera to the windshield, a radar sensor can be re-positioned along its X- and Y-axes using screws, thereby also adjusting its measurement field. This is possible using the CSC Tool basic kit. For radar heads without measurement mirror (e.g. Mercedes), a radar adapter kit is available.

2. Instructions

Adaptive Cruise Control: Adjusting ACC radar sensor in Audi RS 7

The requirements for this are the CSC Tool (familiar from camera calibrations) with optional radar attachment, a mega macs diagnostic unit , as well as a battery charger.

Our simplified practical example, based on an Audi RS 7, shows the main steps which should be noted during radar adjustment for the Adaptive Cruise Control System (ACC)

1

Preparation

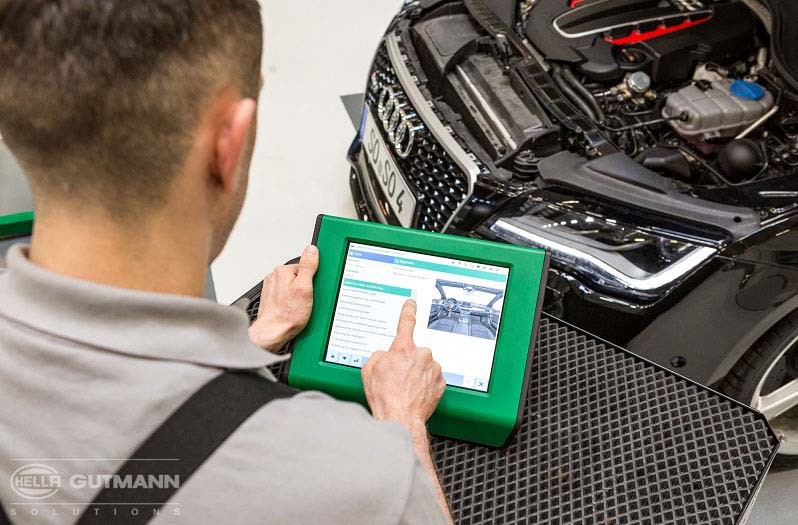
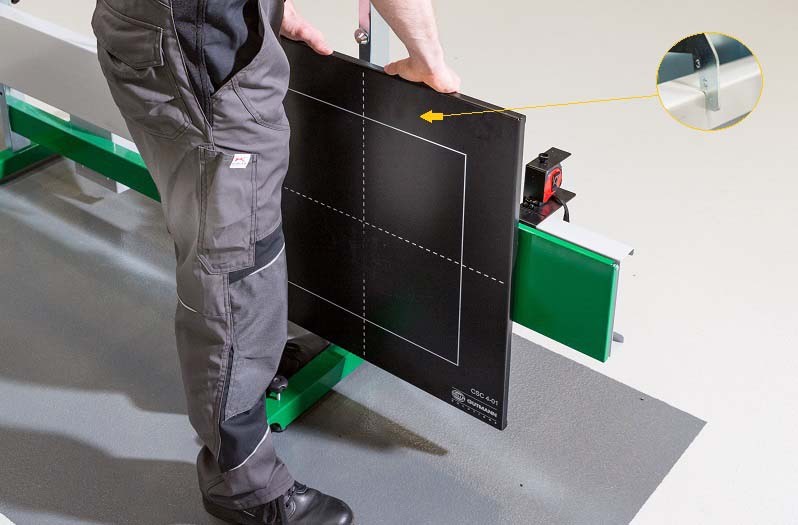
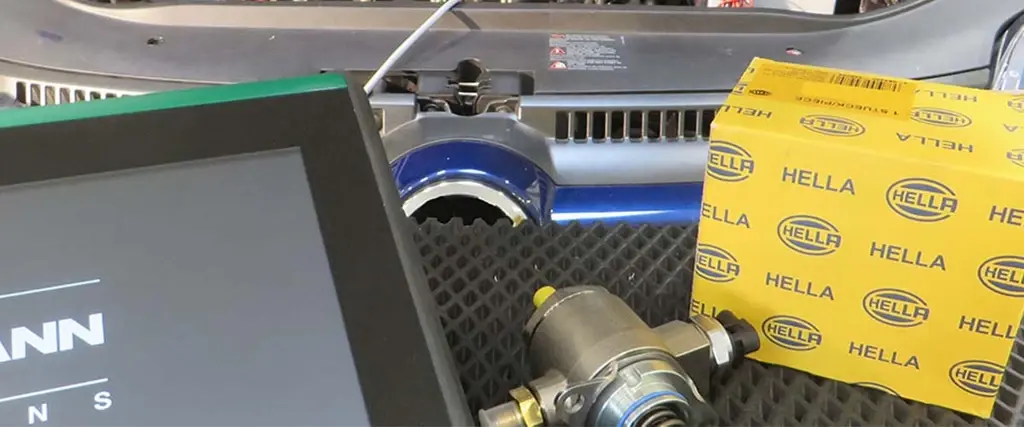
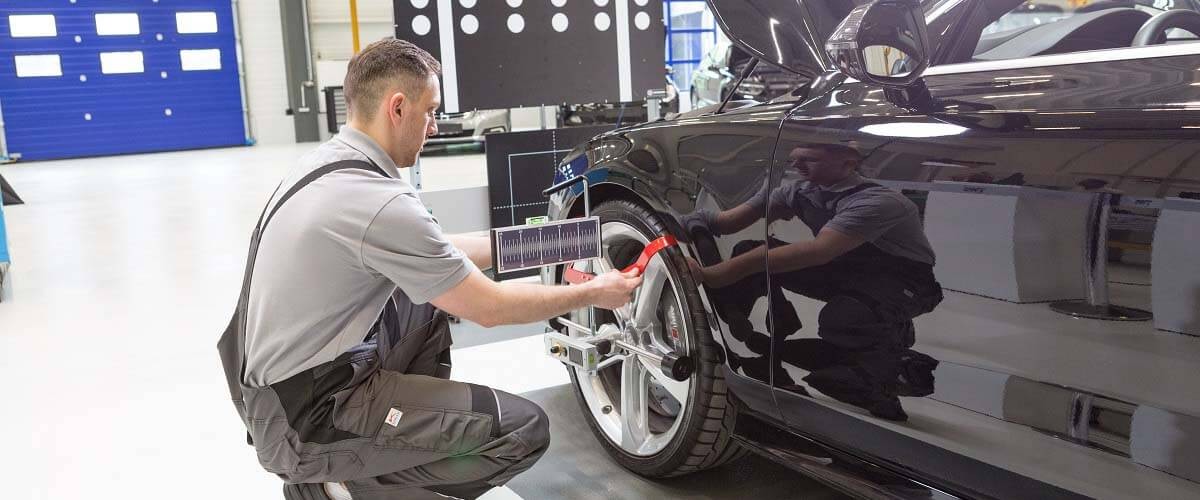
The vehicle is placed on a set-up testing station. In addition to the CSC Tool with radar attachment, the mechanic needs a connected battery charger as well as the mega macs diagnostic unit. From the beginning, the mega macs will guide you through the process.

2

Align CSC Tool

For the radar adjustment, the CSC Tool must be aligned parallel to the front of the vehicle, and to the vehicle's longitudinal axis (in the example, to the rear left wheel bracket).

3

Measuring vehicle distance

The vehicle distance to be maintained is – according to the vehicle – specified by the mega macs and must be measured at the designated points (vehicle dependent). The bubble level helps to check the alignment of the CSC Tool.

4

Exposing sensor

The Audi RS 7 has two radar sensors which must be aligned one after the other. The mega macs specifies the sequence. Before adjusting, the sensor must be exposed.

5

Ready for adjustment of first sensor

The vehicle is now ready for the adjustment of the first sensor.

6

Three-level adjustment of the radar reflector

The radar reflector ( = angle adjustment plate ) has a three-level mounting bracket. It will be aligned in this manner with a positive angle upward ( level 1 ), precisely perpendicular ( level 2 ) or with a tilt downward ( level 3 ). This means that normal driving as well as acceleration and braking processes are taken into account (compare with graphic on the right-hand side).

7

Passing all three levels

All three levels have to be set one after the other.
The mega macs will guide you through each process.
If the sensor requires re-adjustment, the mega macs provides precise instructions.
Following successful adjustment of the first sensor, this is shown

8

Adjusting second sensor

For the second sensor, the described steps are carried out in the same way.

9

Successful adjustment of both sensors

Once the second sensor has also been successfully adjusted, the radar functions of the RS 7 can be used optimally again. With confidence!

How helpful is this article for you?

Not helpful at all
5
4
3
2
1
Very helpful
Success

Wrong Captcha

Wrong Captcha

Error

Something went wrong

Spare Parts Finder Teaser
Manualy Oe-No. Universal Parts
Top manufacturers
Other manufacturers
Vehicle series Back
Vehicle Back

Enter the OE number in the input field. You will usually find the OE number on the spare part itself or in the vehicle documents.

Spare Parts Finder Teaser
Simple vehicle identification with License Plate Also determine spare parts with OE numbers Detailed product information Find wholesalers near you
dummy
Processing Selected Car

Choose category:
Back
dummy
Teilen Sie
Send via Copy link
URL copied to the clickboard !
Article NUmber
Number
Article Number Was Copied !
Search The Web Mounting Instructions
More Details
Name Value
Less Details

Your Dealer
Autoteile Krammer GmbH
dummy
Lechstraße 1-3
68199 Mannheim
Show Map

You might also be interested in

Basic Knowledge
Reading time: 1 minute
Basic Knowledge
Checking the exhaust gas temperature sensor
Step-by-step instructions for testing the exhaust gas temperature sensor - shown on the VW Passat 2.0 TDI.
Reading time: 3 minutes
Injection nozzle/injection valve
Basic Knowledge
Injection nozzle/injection valve – Function & checks
Find out how to diagnose a defective fuel injector and replace it in the workshop.
Reading time: 6 minutes
TPS sensor
Basic Knowledge
TPS sensor – function & troubleshooting
Learn how to check a throttle potentiometer for defects and recognize the most common symptoms.
Reading time: 2 minutes
Throttle valve switch
Basic Knowledge
Throttle valve switch – function & troubleshooting
Everything you need to know to diagnose and repair the throttle valve switch - helpful workshop tips.
Reading time: 2 minutes
Accelerator pedal sensor
Basic Knowledge
Accelerator pedal sensor – function & design
Important tips for checking the accelerator pedal sensor and rectifying defects - practical knowledge for your workshop.
Reading time: 3 minutes
Camshaft position sensor
Basic Knowledge
Camshaft position sensor - function & troubleshooting
Learn all about the function and testing of the camshaft sensor and possible symptoms of a defect.
Reading time: 2 minutes
Air-mass sensor
Basic Knowledge
Air-mass sensor - Function & troubleshooting
Learn how to check a mass air flow sensor, detect defective sensors and replace them professionally.
Reading time: 2 minutes
Car knock sensor
Basic Knowledge
Car knock sensor - function & troubleshooting
Find out how to check the knock sensor for malfunctions and rectify possible fault symptoms.
Reading time: 2 minutes
ABS sensor
Basic Knowledge
Check and change ABS and wheel speed sensors
Instructions for diagnosing and replacing the ABS sensor - all the steps for a professional repair.
Reading time: 10 minutes

Great! Just one more Step

Subscription successful

Head to your inbox and confirm your email address so that you don’t miss our updates!

Get ready for brand new technical videos, car repair advice, trainings, helpful diagnostic tips, marketing campaigns and much more... delivered straight to your inbox every two weeks!