Service Information Brake Pad Wear Indicator BMW model series F10/F11
| Data sheet | |
| Manufacturer | BMW |
| Model series | F10 / F11 |
| Note | Service information - Brake pad wear indicator |
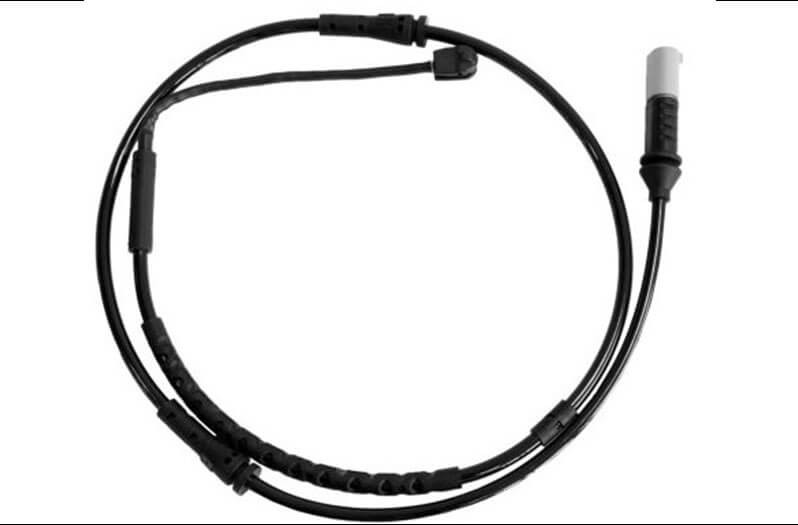
Replacing the warning contacts of the brake pad wear indicator
The BMW maintenance system Condition Based Service (CBS) monitors all systems necessary for operational safety. Sensors and special software programs determine the current and future maintenance requirements based on the vehicle operating conditions. This monitoring also includes wear of the brake pads at the front and rear axles. In order to ensure the fault-free function of the CBS system when calculating the brake pad thickness, the warning contacts of the brake pad wear indicator must also be replaced when replacing the disc brake pads.
Resetting service intervals
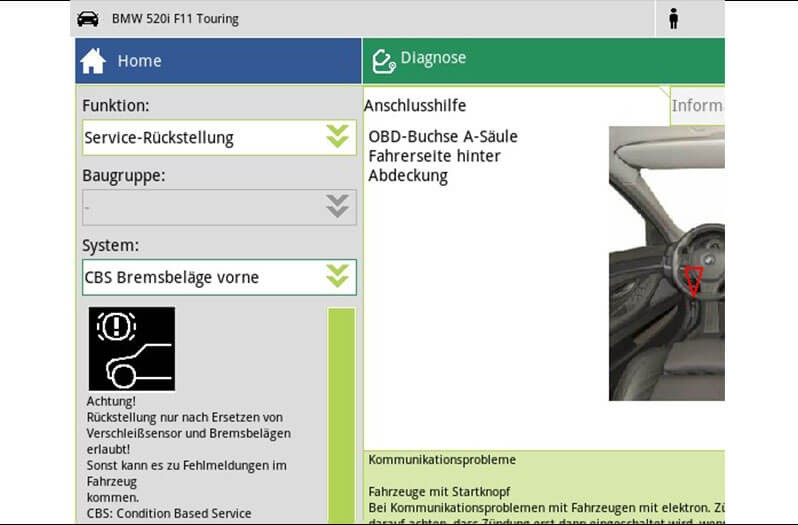
CBS reset using the diagnostic unit
Service reset using the example of a mega macs 66 diagnostic unit.
1. Connect the diagnostic unit
2. Carry out vehicle identification
3. Switch on the ignition
4. Select the function 'Service reset'
5. Select 'CBS brake pads' system at front or rear6. Carry out reset
Follow the corresponding instructions for using the diagnostic unit.
Manual reset
The manual reset is carried out at the instrument cluster.
A reset is only possible if there are no Check Control messages and the on-board data is correctly set.
1. Switch on the ignition
Wait until the time and temperature are displayed
2. Press on the trip mileage reset button (1) until the 1st service scope appears in the display
3. The desired service scope is selected through pressing the button repeatedly.
If a reset is possible, this is displayed as 'Reset can be performed' (2)
4. Press the button for 3 seconds and start the reset
5. Confirm the text message 'Reset can be performed' by pressing the button for 3 seconds
6. The status is shown through a progress bar and 'Resetting' in the display
7. The reset is then confirmed as 'Reset successful'
