Lamp Setting on a Mercedes-Benz W212 (E-class up to model Year 2016)

Scheinwerfer einstellen bei einem BMW 530d f07

Important safety note

The following technical information and practical tips have been compiled by HELLA in order to provide professional support to vehicle workshops in their day-to-day work. The information provided on this website is intended for suitably qualified personnel only.

Step-by-step instructions

1

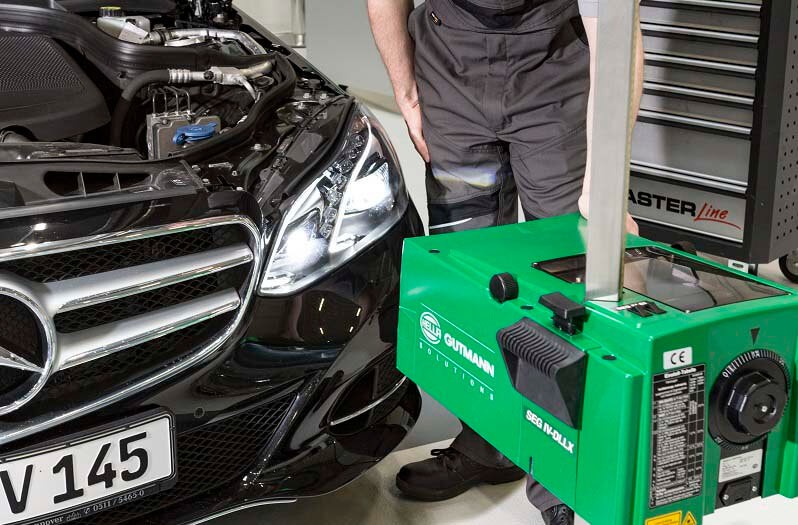
Vehicle and work preparation

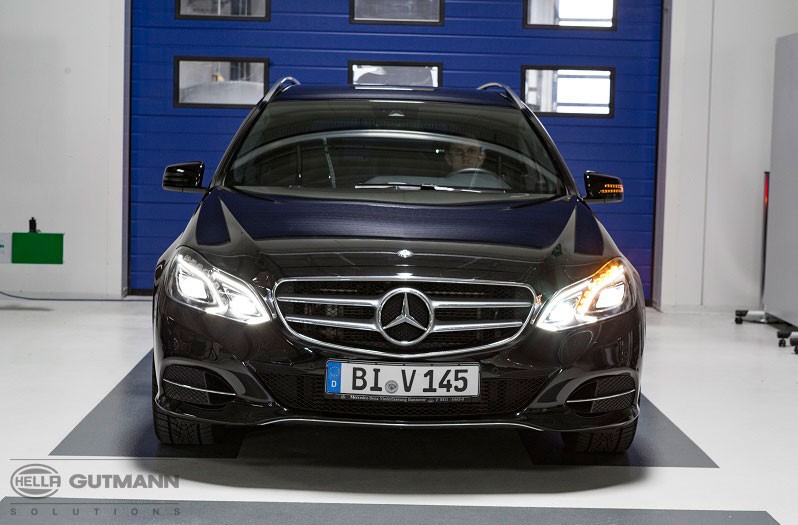
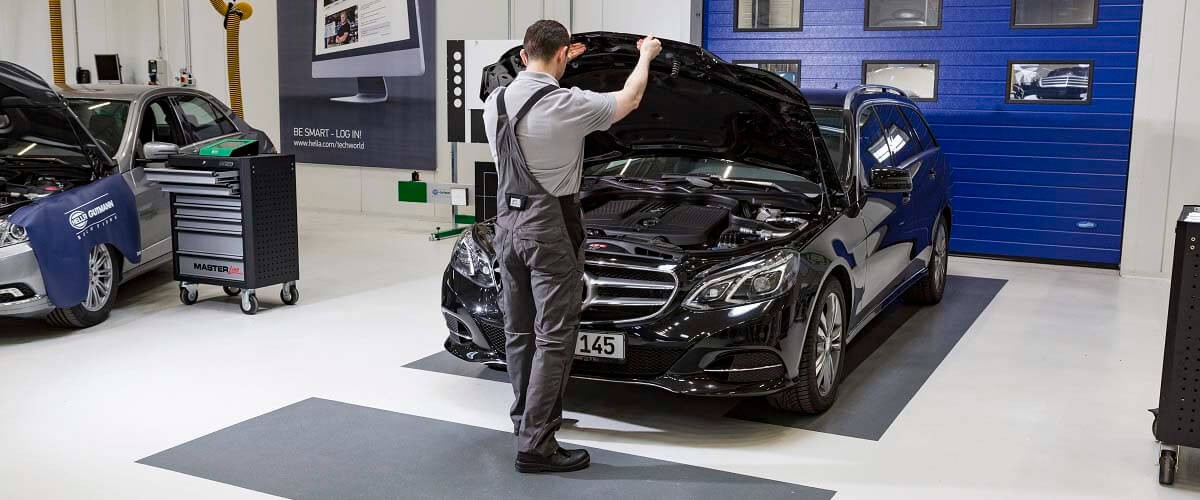
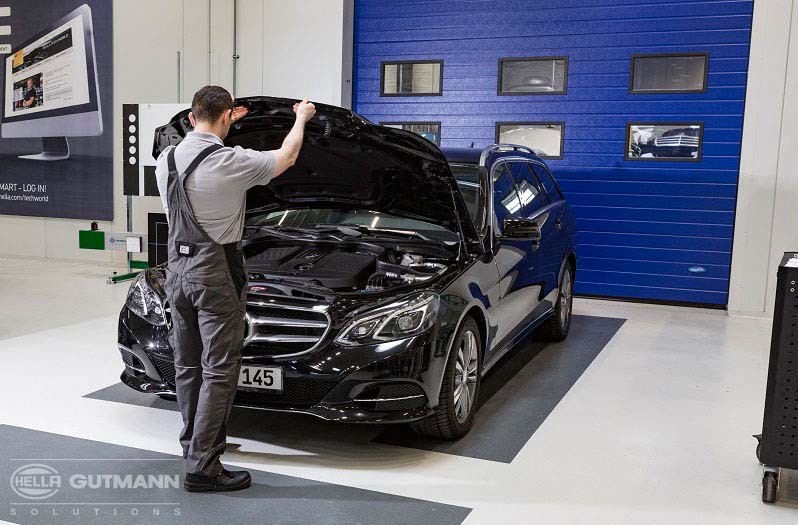
Firstly, the vehicle is prepared: this includes placing it on the properly set up lamp workstation , the connecting of a battery charger and also the visual and functional test.

2

Correct alignment to vehicle

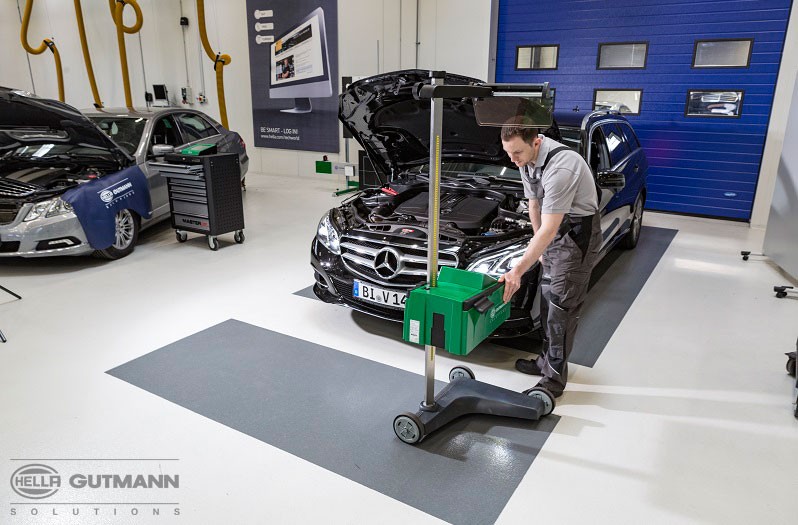
The beamsetter is then aligned to the vehicle.

3

Positioning the SEG in alignment to the lamp

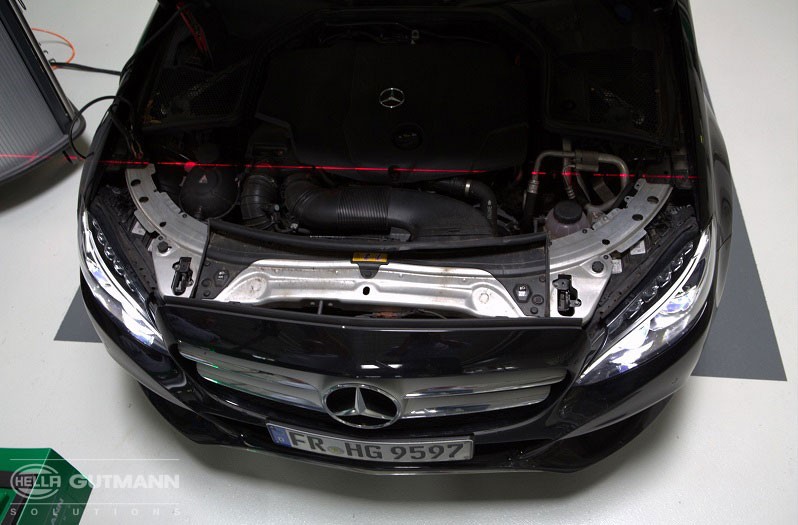
With the SEG IV the device is optimally positioned to each individual light source with the aid of the laser pointer (for double lamps, repositioning is necessary in each case for low beam/high beam).

4

Reading the forward inclination

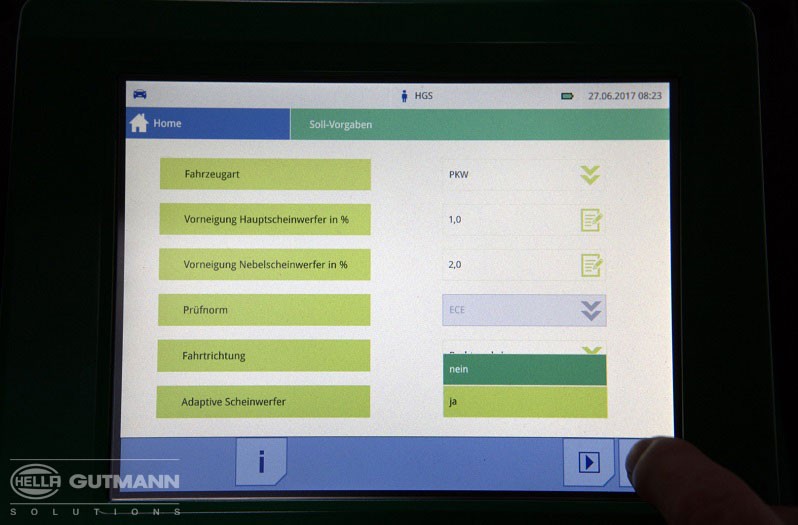
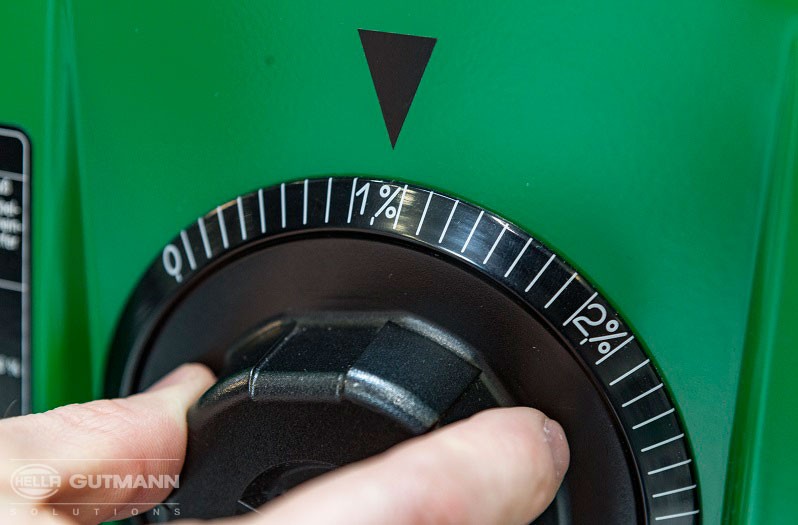
The required forward inclination can be seen on the B-pillar of the Mercedes W212. In the example, this is 1%.

5

Setting the forward inclination

On the SEG IV, the forward inclination read in this way is set accordingly using the rotary control knob. With the SEG V, the forward inclination is automatically taken over by the device during vehicle selection.

6

Initiation of light measurement(s)

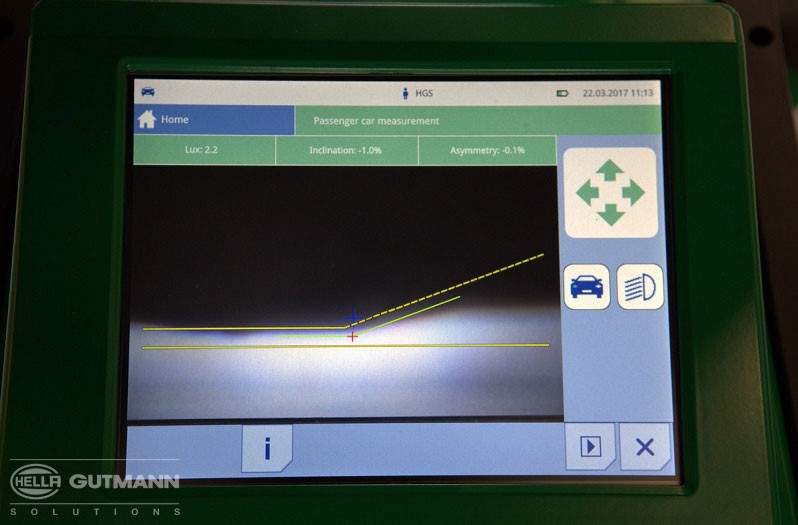
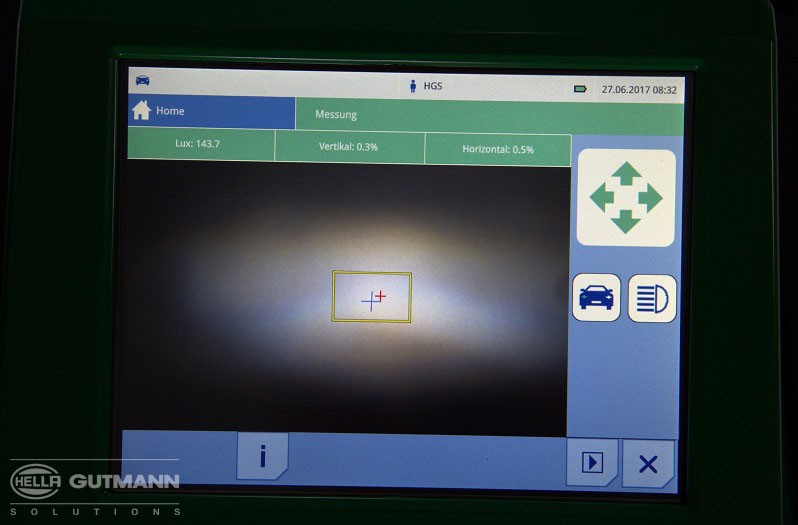
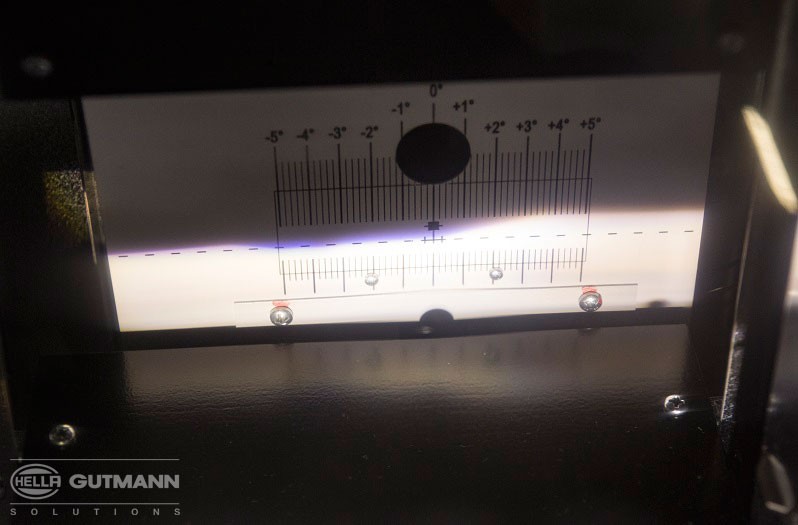
This is followed by the initiation of the actual light measurement, firstly of the low beam.

7

Result of low beam measurement

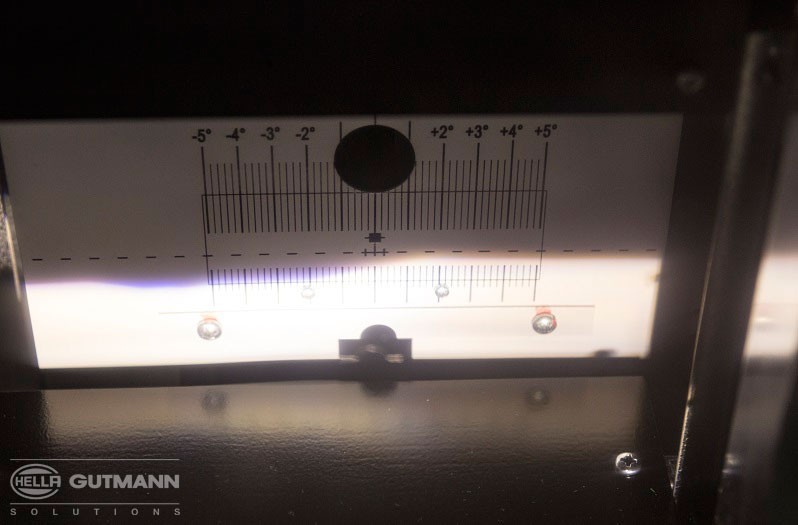
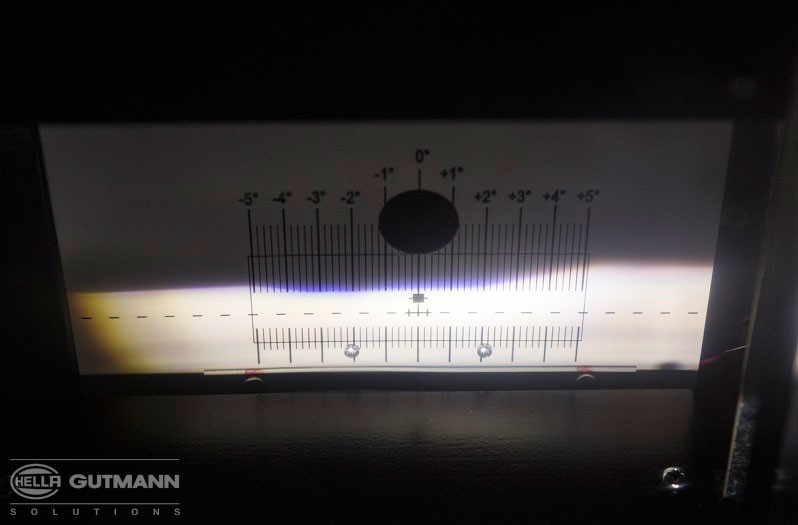
The result of the low beam can be read off the analogue scale on the SEG IV.

With the SEG V the result is displayed digitally. In the example, the light distribution is OK in each case.

8

Result of the high beam measurement

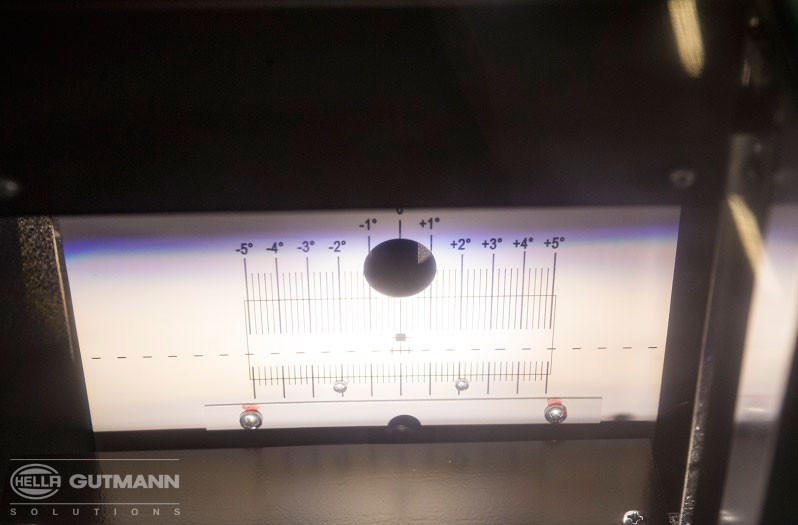
The high beam measurement is then carried out accordingly. The results of the example measurements are also OK in every case.

Deviations from the reference values - two examples

In our example measurements shown above, the results were error-free. But how do results that deviate from the standard value present themselves? Here we provide an overview based on the low beam measurement with the SEG IV.

In the first example, the lamp is set too low and too far to the left. This is shown by the fact that the measurement line runs below the reference line and has a centre offset.

In the second example, the lamp is set too high and too far to the right. The cut-off line runs above the reference line and also has a centre offset.

In both cases, the lamps would have to be readjusted accordingly until the reference specifications are met.

Practical tip

Both the SEG IV and the SEG V allow the lux values generated by the lamp to be measured in parallel with the light distribution measurement. In this way, it is possible to reliably assess whether the maximum permissible glare value of the low beam is exceeded and the minimum illuminance of the high beam is reached or the maximum illuminance is exceeded.

How helpful is this article for you?

Not helpful at all
5
4
3
2
1
Very helpful
Success

Wrong Captcha

Wrong Captcha

Error

Something went wrong

Spare Parts Finder
Manualy Oe-No. Universal Parts
Top manufacturers
Other manufacturers
Vehicle series Back
Vehicle Back

Enter the OE number in the input field. You will usually find the OE number on the spare part itself or in the vehicle documents.

Spare Parts Finder
Simple vehicle identification Also determine spare parts with OE numbers Detailed product information Find wholesalers near you
dummy
Processing Selected Car

Choose category:
Back
dummy
Teilen Sie
Send via Copy link
URL copied to the clickboard !
Article NUmber
Number
Article Number Was Copied !
Search The Web Mounting Instructions
More Details
Name Value
Less Details

Your Dealer
Autoteile Krammer GmbH
dummy
Lechstraße 1-3
68199 Mannheim
Show Map

You might also be interested in

Headlights
Basic Knowledge
Headlight lens components, types & regulations
Comparison of the four most important headlamp systems, including regulations for vehicle lighting - knowledge for the vehicle workshop.
Reading time: 10 minutes
Adjusting and replacing LED headlamps
Basic Knowledge
Adjusting and replacing LED headlamps
Eine Schritt-für-Schritt-Anleitung zur Einstellung und dem Wechsel von LED-Scheinwerfern am Mercedes Benz W212 – mit Video.
Reading time: 10 minutes
Golf 6 rear combination lamp encoding
Basic Knowledge
Golf 6 rear combination lamp encoding
Everything you need to know about coding LED combination rearlights on the Golf 6, including installation instructions and adapter cable production.
Reading time: 4 minutes
Bend lighting
Basic Knowledge
Bend lighting: Function, symptoms, check
Dynamic and static bend lighting: Function, troubleshooting and repair tips - including valuable workshop tips.
Reading time: 2 minutes
Install daytime running lights
Basic Knowledge
Daytime running lights: Retrofitting, installation, coding
Find out how to retrofit daytime running lights, including video instructions, regulations and coding instructions for the workshop.
Reading time: 10 minutes
Headlamp levelling system
Basic Knowledge
What are self-levelling headlights?: Function & check
How does headlamp levelling work? Find out more about dynamic and automatic systems and troubleshooting.
Reading time: 9 minutes
Xenon and headlight bulb replacement
Basic Knowledge
Xenon lamps and headlight bulb replacement
Instructions for changing low beam and xenon lamps in various vehicle types - for the vehicle workshop.
Reading time: 3 minutes
Adjusting headlamps – instructions
Basic Knowledge
Headlamp adjustment – instructions
A general guide to headlight adjustment - with video and tips on optimising light distribution for your workshop.
Reading time: 13 minutes
Light distribution
Basic Knowledge
Light distribution - dipped beam & main beam
Find out all about the light distribution of dipped and main beam as well as special light systems such as country road lights.
Reading time: 7 minutes
LED headlights
Basic Knowledge
LED headlights for cars – function & adjustment
All about LED headlights: How it works, light adjustment on the Audi A8 and helpful workshop tips for repairs.
Reading time: 15 minutes

Great! Just one more Step

Subscription successful

Head to your inbox and confirm your email address so that you don’t miss our updates!

Get ready for brand new technical videos, car repair advice, trainings, helpful diagnostic tips, marketing campaigns and much more... delivered straight to your inbox every two weeks!