The full LED headlamp
Adjusting and replacing LED headlamps
Here you can find useful information and valuable tips on all aspects of replacing and adjusting an LED headlamp on a Mercedes-Benz W212.


The following information including service work shown is based on the example of a Mercedes-Benz W212 (model year 2014) but also applies to other vehicle models with identical component systems.
Important safety note
The following technical information and practical tips have been compiled by HELLA in order to provide professional support to vehicle workshops in their day-to-day work. The information provided on this website is intended for suitably qualified personnel only.
TABLE OF CONTENTS
The full LED headlamp: Design
Requirements for vehicle lighting are steadily increasing, a fact which places high demands on vehicle lighting systems. LED headlamps with innovative light functions are integrated into the technical systems of modern vehicle models. The functions are monitored by higher-level control units. Even a seemingly simple replacement of a headlamp requires special work steps in order to carry out a professional diagnosis and repair.
The following information including service work shown is based on the example of a Mercedes-Benz W212 (model year 2014) but also applies to other vehicle models with identical component systems.

The full LED headlamp
The full LED headlamp
System components
Defective LED headlamp: Symptoms
The following effects can occur if LED headlamps fail:
- Fault lamp lights up (system-dependent)
- Fault entry in the relevant headlamp control unit
LED headlamp defective - the causes: Causes of failure
The following causes may be responsible for failure or malfunction:
- Power supply faulty
- External damage; accident
- Vehicle system, CAN bus values implausible
- Failure of headlamp electronics
- Defective control unit
- Defective headlamp fan
Checking LED headlamp: Troubleshooting
The LED headlamps or indeed vehicle lighting is monitored by higher-level control units. Any occurring errors are stored in the control unit's error memory and can be read using a suitable diagnostic device.
With some vehicle models, a warning message can also be displayed on the instrument cluster in the event of a system error. However, before control unit diagnostics are undertaken, it is first advisable to carry out a visual check on the individual system components as part of initial troubleshooting activities.
Control unit diagnostics
As part of control unit diagnostics, it is possible to employ the help of various functions and vehicle information as and when needed.
Error code
Parameters
Actuator test

Figure 1: Error code

Figure 2: Parameters

Figure 3: Actuator test
Figure 1: Error code
Adjusting LED headlamp: Instructions
Preparation for headlamp adjustment
Before the headlamps can be adjusted, the following work must be carried out on the vehicle:
- Check tyre pressure and correct if necessary.
- Check load.
- Ensure correctly calibrated vehicle level; for vehicles that were previously raised, roll/drive them a few metres before adjustment so that the chassis "springs in".
- Put the steering wheel in "straight ahead" position.
- Close all doors.
- Read off the vehicle-specific forward inclination, in this case 1%.
- Beamsetterto be set up and aligned in front of the vehicle, i.e. in front of the headlamp
IMPORTANT
The vehicle and the beamsetter must stand on level ground (with the headlamp setting location in accordance with country-specific requirements).
It is recommended to connect a suitable battery charger to support the vehicle electrical system.
Adjust the headlamp using the beamsetter
The various diagnostic options are shown as examples by the mega macs 77 diagnostic device. The respective test depth and variety of functions can be set out differently depending on the vehicle manufacturer and these are dependent on the relevant system configuration of the control unit.
1

Carry out the following steps on the diagnostic device / vehicle

Select basic setting "Adjust headlamp"
Select basic setting "Adjust headlamp"
Connect a diagnostic device and then set up a beamsetter in front of the vehicle.
- Select vehicle
- Switch on the ignition
- Read out and clear error memory
- Select basic setting "Adjust headlamp"
- Select zero setting
- Switch on headlamps
- Confirm zero setting. This sets the headlamps to the basic setting "Adjust headlamp".
- Carry out headlamp adjustment, i.e. beam setting.
2
Set the dial and light pattern

Figure 4: Analogue beamsetter - mechanically adjust the light pattern in the horizontal position to the reference line of height adjustment or the vertical cut-off line to the O° line
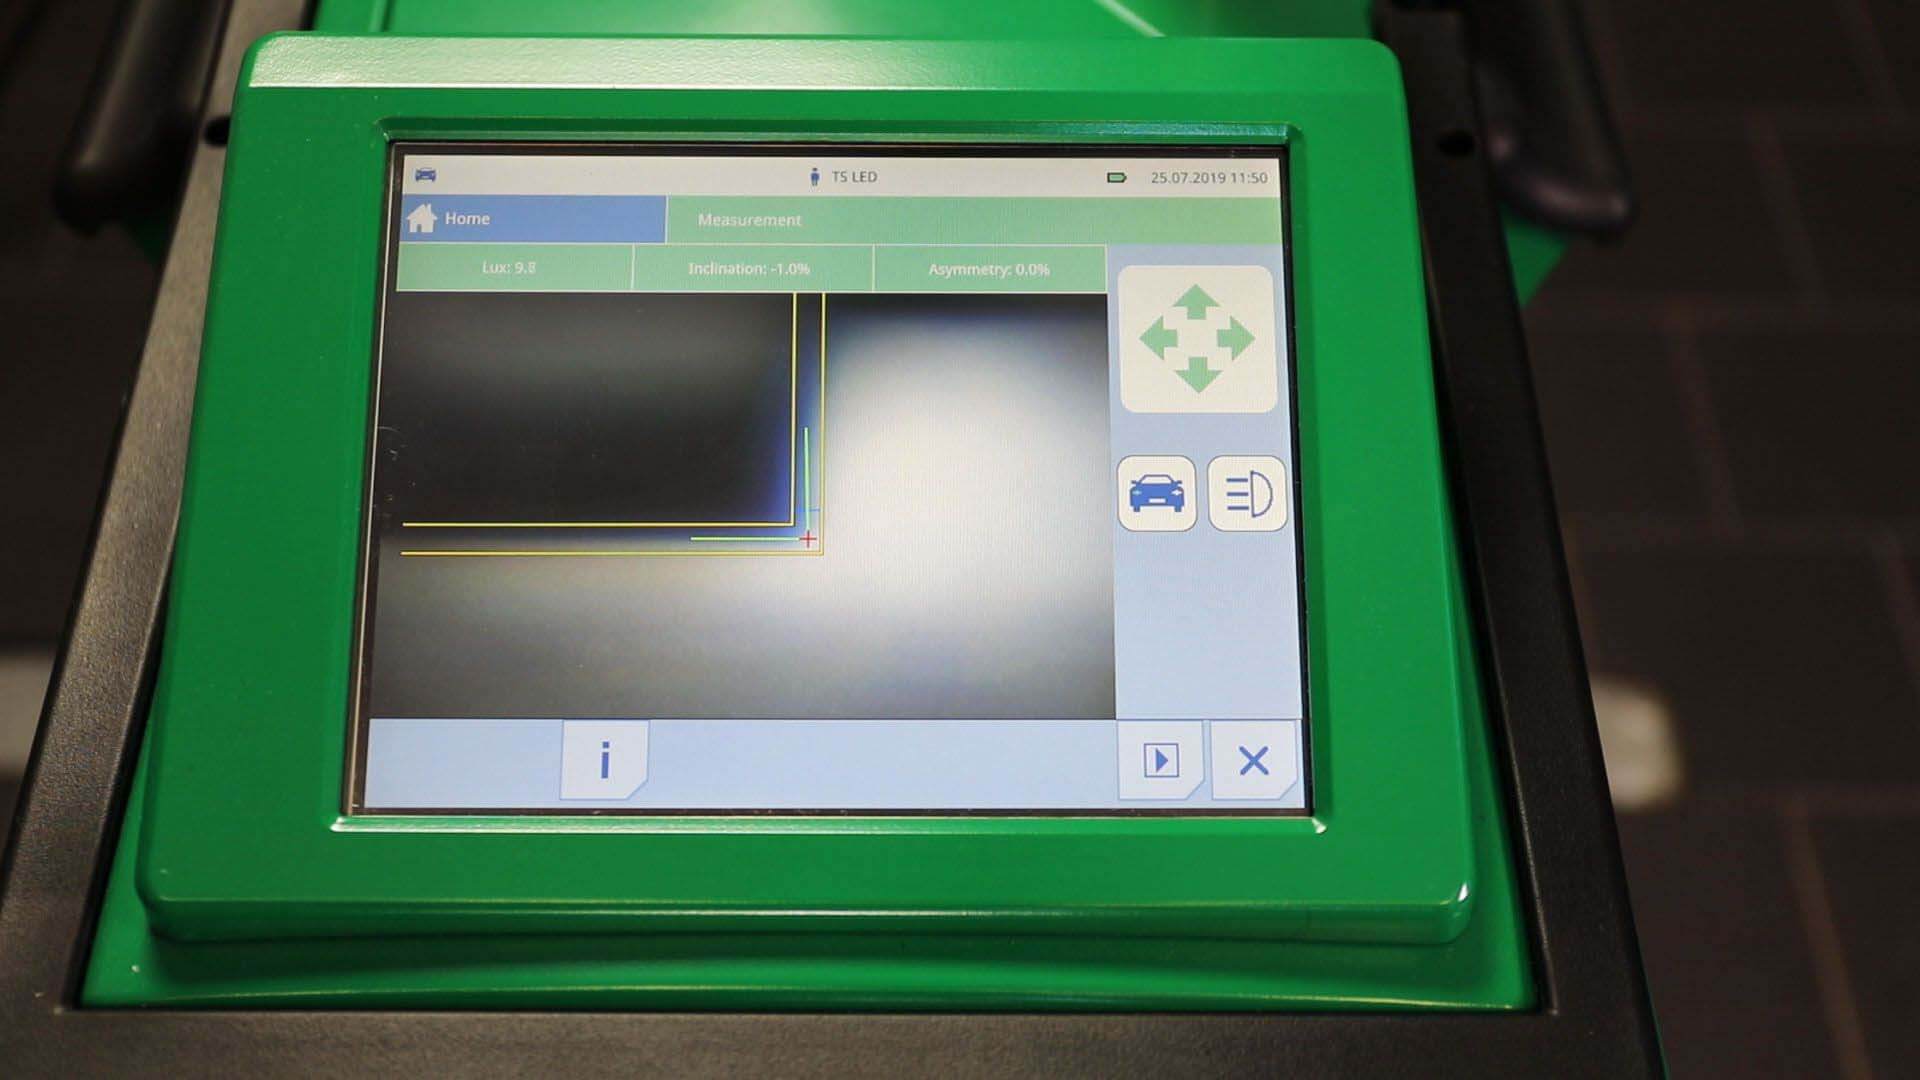
Figure 5: Digital beamsetter - using the digital guide lines, mechanically set the correct light pattern
Figure 4: Analogue beamsetter - mechanically adjust the light pattern in the horizontal position to the reference line of height adjustment or the vertical cut-off line to the O° line
Set the dial of the analogue beamsetter to 1%. Mechanically adjust the light pattern in the horizontal position (reference line of height adjustment) or the vertical cut-off line to the O° line (Fig. 4).
With the digital beamsetter, use the proven vehicle and headlamp system selection. Select the forward inclination 1%. Then using the digital guide lines, mechanically set correct adjustment of light pattern (Fig. 5).
3
Confirm new values


Following adjustment, confirm new values on the diagnostic device.
THE FOLLOWING MUST BE OBSERVED WHEN MOUNTING THE LED HEADLAMPS:
- Secure vehicle to prevent automatic starting
- Completely switch off the electrical system, remove the ignition key
- Dismantle wheels, inner mudguards, bumpers
- Disconnect electrical connections
- Remove the headlamps
- !!! ESD (electrostatic discharge) - guard against this when handling electronic components.
- Attach the control units to the new headlamps at a separate workstation. Make sure that the connectors are correctly locked and that the seals are seated correctly. Observe tightening torques!
- Adjust the height of the fixing banjo bolts between the old / new headlamp. When assembling, this is helpful in order to comply with the body gap dimensions/bumper headlamps.
- Adaptation: in some cases it may be necessary to adapt the LED headlamp to the vehicle after mounting and before adjustment. In order to do this, a connection between the vehicle and the server of the vehicle manufacturer has to be set up. Connect the diagnostic device or VCI unit to the server in accordance with the manufacturer's specifications and follow the vehicle manufacturer’s instructions of use.
REPAIR INSTRUCTIONS
Repair work on the lighting system in a vehicle may only be carried out by trained specialists. Repair work that is carried out incorrectly can lead to system failure and to severe personal injuries. For all repair work performed on the lighting system, please observe the safety and assembly instructions relating to the system in question and/or to those instructions provided by the relevant vehicle manufacturer.
Changing LED headlamp on a Mercedes-Benz W212: VIDEO
Replacement of a full LED headlamp on a Mercedes-Benz W212
In this video we show you how to professionally replace a full LED headlamp on a Mercedes-Benz W212 (model year 2014).
Replacing headlamp control units – flashing / coding control units: Instructions
After replacing the headlamp, individual components or the control units, it may be necessary to adapt or align the unit software to the respective vehicle periphery. Depending on the repair process, the LED code can be coded or new control units can be registered. These procedures are usually carried out online by means of a diagnostic device. This requires access authorisation to the online portal of the relevant vehicle manufacturer.
In our case study, the LED headlamp configuration is carried out, as an example, using a Hella Gutmann macsRemote diagnostic device and macsRemote Services.
Programming control units: Instructions
Programming, also called flashing, is carried out remotely using a suitable diagnostic device. The prerequisite is a stable connection to the server of the relevant vehicle manufacturer.
So, for example, after replacing a control unit, the following procedures and programming functions are carried out.
After connection to the vehicle, first of all vehicle identification and the codes of the control units are queried. Following successful identification, initialisation of the new control units is performed. In this automated process, the hardware, software status and the variant of the control unit are recorded and matched to the vehicle.
Depending on the vehicle and system configuration, the following adaptations are carried out in order to achieve operational status:
- Update of the basic software
- Control unit variant
- Adaptation of the VCD vehicle data record segments
- Low beam
- Active dynamic cornering light
- Motorway light
- High beam
- Fog light, extended
- Off-road light
- Daytime running light
- Warning light
- Direction indicator light
- Stepper motor parameters
- Light colour LED configuration
- Extended vehicle-specific data records
After successful programming, a test run is automatically carried out on the headlamp. In this reference run, the functions of the headlamp are tested (Fig. 01 to Fig. 04).

Figure 1: Photo W212 headlamp “flashing function”

Figure 2: Photo W212 headlamp “DRL function”

Figure 3: Photo W212 headlamp “LB function”

Figure 4: Photo W212 headlamp “HB function”
Figure 1: Photo W212 headlamp “flashing function”
Flashing / coding LED headlamp control units: VIDEO
LED code: Instructions
The light colour of the LED lamps is also configured as part of the programming.
This function is necessary in order to optimally adjust the LED lamps of the new headlamp to the vehicle configuration.
The LED code is individually assigned to each individual lamp unit and appears on the headlamp housing. During programming, the LED code must be read and entered in the diagnostic application.

Figure 1: W212 LED-SW “Front View”

Figure 2: “Prepare” W212 LED code LED code “watermark/ centre”

Figure 3: W212 headlamp view/ please note_ positioning of LED code
Figure 1: W212 LED-SW “Front View”
IMPORTANT
So as to avoid unnecessary delays while programming, photograph the LED code before beginning to mount the LED headlamp!
Coding of further functions: Instructions
Depending on the vehicle model and the region where the vehicle will be used, it may be necessary for the headlamps to be subsequently readjusted. Depending on the function, this can be done by the on-board electronics or by online support.
In this way, for example, country-specific requirements are adapted.
Country-specific requirements / regulations can involve, for example, the following switch-on conditions for the headlamp.
Light codes:
- Daytime running lights switched on
- Daytime running lights switched off
- Daytime running light switched on + rear light switched on
- Coming home, leaving home switched on
- Coming home, leaving home switched off
- Tourist light (driving in left-hand traffic with left-hand drive)

Figure 1: MMI low beam setting for: Right-hand traffic

Figure 2: MMI low beam setting for: Left-hand traffic

Figure 3: MMI low beam light distribution, analogue: Right-hand traffic / asymmetry

Figure 4: MMI low beam light distribution, analogue: Tourist solution / symmetry

Figure 5: MMI low beam light distribution, digital: Right-hand traffic / asymmetry

Figure 6: MMI low beam light distribution, digital: Tourist solution / symmetry
Figure 1: MMI low beam setting for: Right-hand traffic
How helpful is this article for you?
Not helpful at all
Very helpful